Instructions
Ready to get started with this activity? To keep track of your progress, check off the instructions for each step below as they are completed. Make sure to check the box of the last step when you’re done to receive congratulations for your completed activity!
Electricity is a form of energy. It needs a circuit to make things work. The electrons need to flow from one end of the battery (positive) to the LED and back to the battery (negative).
Consider this:
The first electric hand flashlight was shown in New York City, by Conrad Hubert, in the 1890s. His first portable flashlight was hand made from paper and fiber tubes, it had a small lightbulb and a brass reflector. The batteries he used were weak and lightbulb was not very sophisticated so when he turned on the flashlight it would provide a brief flash of light – thus giving the device its name. Flashlights have sure changed over the years! Most have LEDs instead of lightbulbs and they can produce very bright lights for long periods of time. Some are even waterproof! Now it’s your turn to make an advancement on Conrad Hubert’s invention.
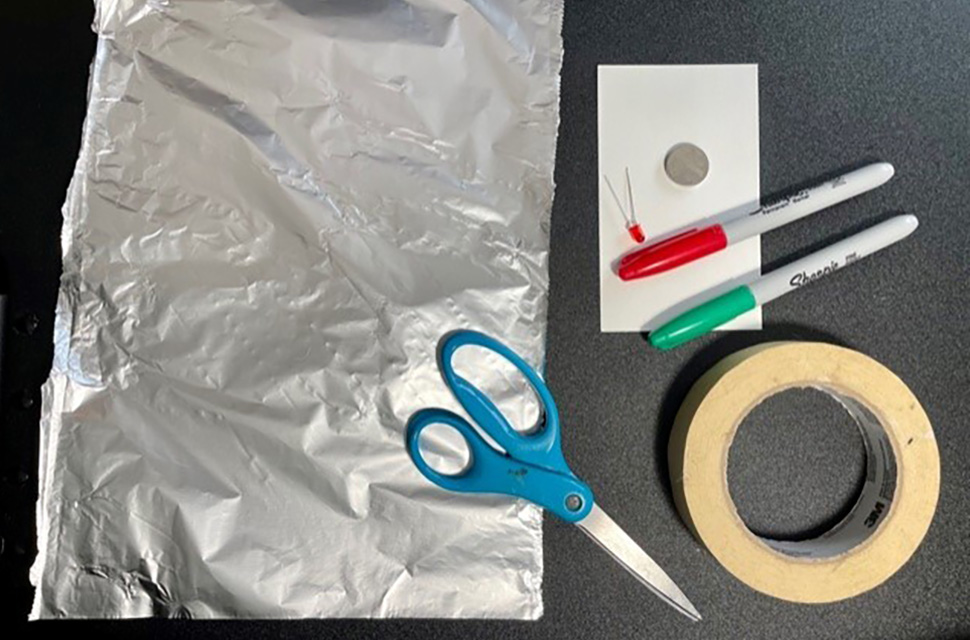
MATERIALS
- Scissors
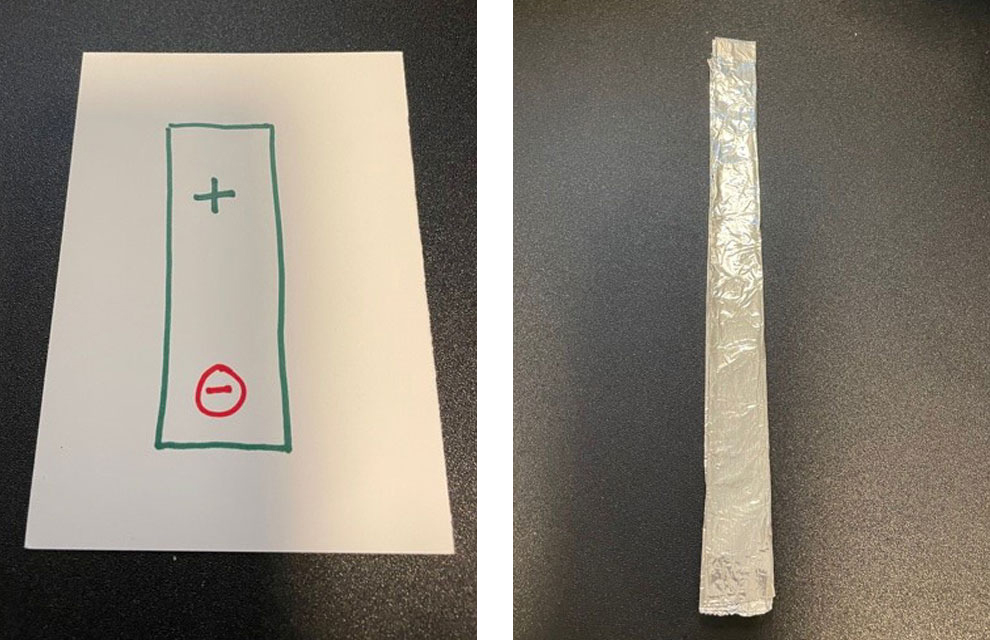
- Aluminum foil (4” x 12”)
- Stickers or masking tape
- 1 Index Card (3”x5”)
- 1 Battery (3V 2032 button)
- 1 LED
- Markers
- Tear off a piece of aluminum foil about four inches thick and the length of the roll.
- On one side of the index card draw a rectangle, leaving about an inch at the top and the bottom of the rectangle. This will represent your battery.
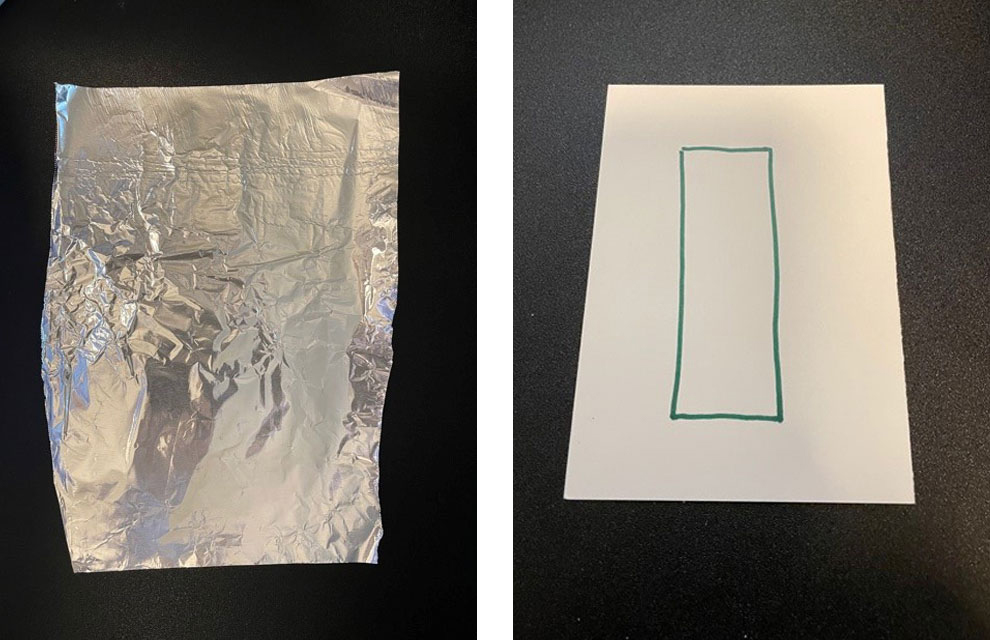
- Mark the top of the rectangle with a + (positive symbol) and the bottom with a – (negative symbol).
- Fold aluminum foil into a long rectangle, about an inch thick.
- Lay the LED light at the top of the card.
- Insert the LED prongs into the aluminum foil strip and attach with masking tape or stickers to the index card along your drawn battery.
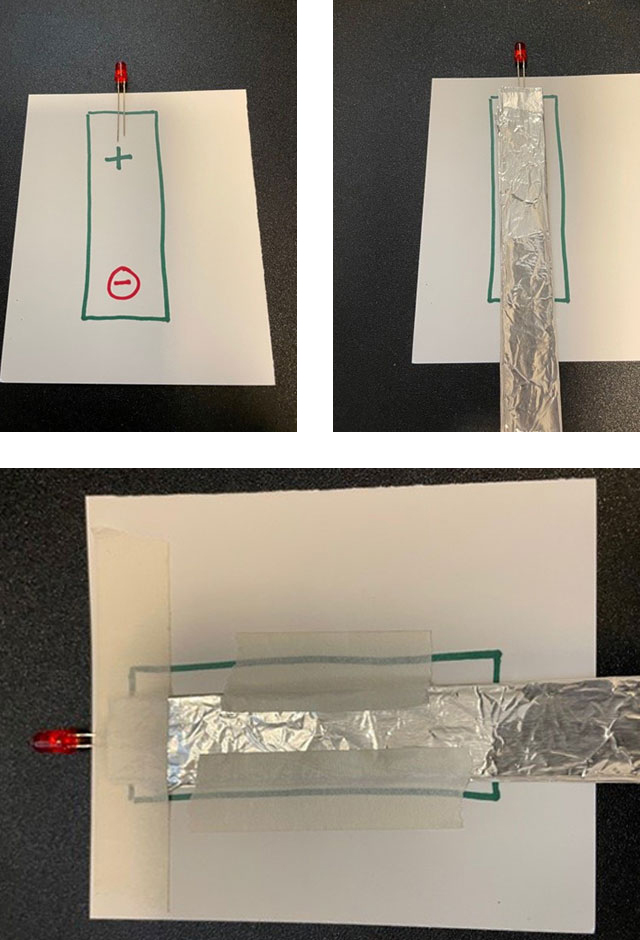
- Place the battery button near the bottom of the aluminum foil, and attach the sides with masking tape or stickers. The battery must have full contact with the aluminum foil.
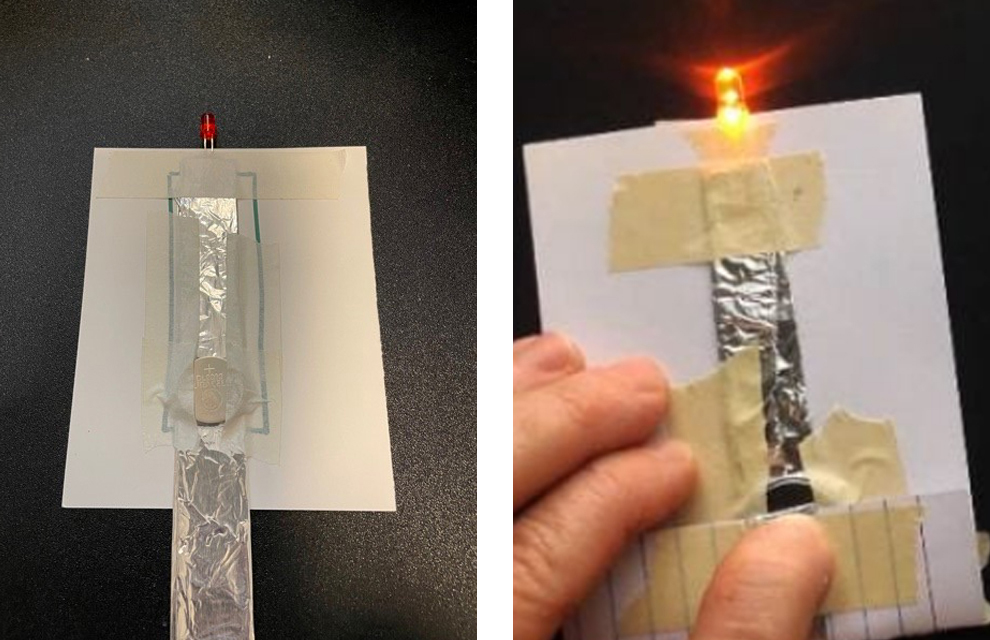
- Fold the long tail of aluminum foil up to touch the battery.
- Did your LED light turn on?
- Does the tail of aluminum foil act like a switch? Does it break the flow of electrons and shut off the LED?

Congratulations, you're a PowerZone rock star! Ready to explore more games and activities? Let's go!
Explore More Games and Activities